- Joined
- Jan 21, 2010
- Messages
- 25,510
The first thing you need to do is to ensure that the two voltage regulators with the metal tabs are not touching. If you can melt the solder joints on the two leads nearest the other regulator you should be able to pivot one of the regulators slightly away from the other one.
I think the next thing you should try is to touch up the solder joints on those two large caps. If you're lucky this will fix the hum problem.
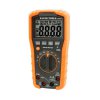
Next use your meter on a volts range to measure the voltage from the common point the capacitors are soldered to to the other side of the caps. You should get roughly the same voltage on each (maybe around 20V?) but one will be negative and the other positive.
If this is OK, then place your meter on an AC range and measure the same places as before. The reading should again be similar, but should be very small.
I think the next thing you should try is to touch up the solder joints on those two large caps. If you're lucky this will fix the hum problem.
Next use your meter on a volts range to measure the voltage from the common point the capacitors are soldered to to the other side of the caps. You should get roughly the same voltage on each (maybe around 20V?) but one will be negative and the other positive.
If this is OK, then place your meter on an AC range and measure the same places as before. The reading should again be similar, but should be very small.