Maker Pro
Maker Pro

Modifying an antique camera

landcameras

Jun 3, 2014
13
Joined
Jun 3, 2014
Messages
13
I'm a camera technician (of the modern era) who works on antique cameras. I don't have the deep electronics knowledge that my profession's techs in the past were required to have. So saying that, I'm knowledgeable enough just to make me dangerous.
Here's what I need help with, and it’s quite simple I just needs some quick questions answered in guidance. I have an antique camera that I'm modifying. There is a single capacitor that controls exposure (the shutter). This camera was limited to one type of film, or film speed by this single capacitor. A more advanced camera would have multiple capacitors, controlled by a switch accessible to the photographer labeled as film speed. (100 speed / 200 speed/ 400 speed etc.).
The goal of this project is to add that switch. That is the easy part, I understand that and have already determined the capacitance needed. What I’m struggling with is the best way to do it, in regards to economy of space. This project really is electronics 101, but I’d like to take it a step further with some help.
Assets:
  1. Easy access to the original capacitor.
  2. A little bit of space to work with. I say a bit, because if it were anywhere else on the camera’s single circuit board, I’d be running wires elsewhere to create enough space. That said, internally I’ve got ~1/2” x ½” x ½” or so. Much of it going to be taken up by the switch. So we’re talking small.
Challenges:
  1. Space
  2. Desire to make this a more complex array
Desires
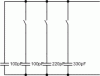
  1. Basic: two capacitors wired together with a switch.
  2. Good: Three capacitors wired together with an SP3T switch
  3. Ideal: Capacitor array of some sort attached to a dial for selecting many speeds.
  4. Over the moon: 3 capacitor positions really is enough that dial is simply a more cumbersome way to do what I’m talking about here. Is it possible to wire a trimmer inline with capacitors for micro adjustments? Errr. Is that a resistor? Basically instead of creating a big array with 6 or more separate capacitors. It would go Cap > Trimmer > existing camera circuit. This would allow for micro adjustments below the range of each specific Cap. I would have had to choose specific cap values for each camera just to get the desired result. If this is an electrically valid solution the trick is to make it small. The desire here is the age of the components, and variance in design over the years. Some designs did the same thing with a 100pf as they did with a 220pf cap. Its just something different upstream. I’d like to accommodate all of them with one simple mod detailed here.
Lastly, the over the moon solution is my pea sized knowledge putting something together. Is there a better way?
If I’m correct, I’d like some project parts list help. Or whatever guidance you might be able to give.
For those interested, the camera is a Polaroid SX-70. The mod is to both tune exposure and allow for photographers to shoot SX-70 film and 600 film in them.
Thanks!
 

Solidus

Jun 19, 2011
349
Joined
Jun 19, 2011
Messages
349
Let me start off by admitting that a lot of this post won't involve specific technical detail as I haven't done research on a lot of this stuff in awhile. I enjoy photography a lot; I've never played with the internals of my cameras, but this makes sense - it's a calibrated timing circuit.

I'm not sure if this fits under #4 but here's an idea: use a varactor. What a varactor is, if you're not familiar, is a diode that has capacitance. By reverse biasing the diode, a capacitance (and a variable one at that) appears between the two terminals. Take a look at the first page of the NTE618 diode. It lists the different capacitances under different biasing voltages.

By using something like this and a calibrated potentiometer circuit (which is fairly simple to devise), you could have essentially infinitely-variable speed adjustment within the range of the varactor diode (and within the mechanical limits of the shutter mechanism).

This would allow you to have ideally as much control over the exposure as you would need and more. It can be taken many steps further also, from simple potentiometer-wheel control to advanced things like a very small microcontroller (the ATmega328ps on the Arduino boards that are surface-mounted are between 4-8mm to a side) and a tiny bubble readout with a couple switches for speed adjustment, where it has the correction factors in place to give you an estimated shutter speed.

Let me know what you're in for. Seeing this project actually makes me wish I would've known this, and I might be trying this after you!
 

landcameras

Jun 3, 2014
13
Joined
Jun 3, 2014
Messages
13
Solidus,
thanks for the words, and advise. I'll check out the varactor, Though since this is an end user function (the switch between 3 film types) adding a wheel would only be confusing and lead to mistakes I fear. That is unless these are tunable and precision (with click stops like a shutter wheel), we could then turn an automatic camera into a manual shutter speed selectable camera (the holy grail of this camera). But in that vein, this solution is way too much work. I've already got ideas with the arduino that would solve this with no camera disassembly. I just don't have the arduino chops to do it.

My arduino solution is this: The camera(s) in question are simple consumer grade automatic cameras. Quite advanced for their day, but these days people want full manual cameras that shoot polaroid film. There just wasn't any made that are cost effective. In the SX-70 there is a simple sensor with a mechanical dial that simply is a variable ND filter (clear to about 3 stops darker) that slides over the sensor. The sensor is imbedded in a circuit board near the back. This is the circuit i'd be modifying with my idea above.. the arduino steps in with a simple clip that blocks ALLL light to the sensor. On the arduino there would be a dial like you detailed above for shutter speeds (or equivalent, I think EV would be the best representation for these cameras). The arduino would have an input from the camera to start a timer exactly when the shutter is pressed (the remote shutter button which is electronic should provide accurate timing que). When the internal timer on the arduino reaches say 1/125sec it would flood the sensor with an LED, triggering shutter close. We've just used this old, corroded and certainly not accurate sensor against itself. Its now simply a switch, we just have to tell it when to turn on and off.
For an arduino pro, this would be way simple. there is CERTAINLY a market for it, and i'm positioned right at the top. I project sales somewhere above 10,000 on this device. I just don't have the know-how or cash to hire a team. My solution is this manual one above. It takes quite a bit of time to do, but I am already setup for camera repair at my retail store so that's what i'm currently aiming for.
 

(*steve*)

¡sǝpodᴉʇuɐ ǝɥʇ ɹɐǝɥd
Moderator
Jan 21, 2010
25,510
Joined
Jan 21, 2010
Messages
25,510
The big question I have is the value of capacitance you require for the three film speeds.

If you mentioned it in your post, I'll have to blame a tiny screen on a phone for me not seeing it.
 

Harald Kapp

Moderator
Moderator
Nov 17, 2011
13,722
Joined
Nov 17, 2011
Messages
13,722
A varactor probably won't work. It is used as an adjustable capacitor in tuning circuits. In this application, however, the capacitor is used as the timing element which usually means that it the amount of charge stored is proportional to the time. By charging the capacitor you would change the capacitance mixing up the whole setup. Vice versa the DC bias required to adjust the capacity of the varactor will mix up the timing.

As I understand, you intend to have at least 2 (or more) capacitors, where for each film speed (or exposure) one capacitor is selected via a switch. Do you require a single n-position switch? Or could you live with having a set of small switches, e.g. DIP switches like these? They are very small, which is god from the perspective of space requirements, but a bit difficult to operate (because they are small). Instead of having one capacitor per film speed, you can use the DIP switch to put one or more capacitors in parallel. Having e.g. a 100pF cpacitor and a 220pF cpacitor allows you the following combinations:
100pF, 220pF, 320pF. Using more capacitors increases the number of permutations. The "cost" is that you have to "encode" the film speeds (exposure times) by having a dedicated set of switch positions for each. This schematic shows a set of four capacitors and 3 switches just for exampel:
cap-gif.13275

All switches open -> 100pF
All switches closed -> 750pF
other valuse in between according to switch position.
By not switching the leftmost 100pF capacitor i is ensured that always at least one capacitor is active. Use SMD capacitors for small size.

Instead of a DIP switch you can also use a coded rotary switch like e.g. this one. Bigger versions with knobs also do exist.

Harald
 

Attachments

  • cap.gif
    cap.gif
    2.6 KB · Views: 673

Solidus

Jun 19, 2011
349
Joined
Jun 19, 2011
Messages
349
Ah, I see. Must've misunderstood your intent and/or gotten carried away with ideas.

That was one thing I neglected to mention - the need for demarcating the dial in some way so that the user knows what speed is where. A dial isn't intuitive like the shutter switches we know with detents.

I see what you mean. You can find master oscillators for timing purposes that are within 50 parts per million at 20MHz easily, so timing accuracy need not be an issue here. You'd have the shutter switch kick off the timer, when the timer hits the preset it throws an LED. That is very simple, both in theory and in practice (relatively, depending on your experience with coding). I haven't dealt with ISRs/timers (the specific concepts here) in awhile but it won't take much of a refresher to bring it back.

I only see three caveats to this -

1. Designing a board able to fit into the enclosure such that wires or board aren't sticking out
2. Finding a way to jumper the switch in a way that won't interfere with the shutter mechanism itself (i.e. not accidentally shorting it or something of the like)
3. Designing a light-leak-free way of tripping the light sensor. A little light goes a long way and I've had to shelve many of my 35mm manuals due to leaky shutters ruining film.

If an even moderately-clever solution can be devised, you being a technician with these things would make assembly a piece of cake.

I'd be willing to help you with everything - trust me, I'm a college student and if the stuff I do on my website is any indication, lack of startup or build funds hinders me as well - I understand the plight of not having capital to bring additional "professional" hands onto a project. I'll work with you on this for free and everything else can be figured out as it becomes relevant if you so wish.
 

landcameras

Jun 3, 2014
13
Joined
Jun 3, 2014
Messages
13
The big question I have is the value of capacitance you require for the three film speeds.
I mentioned that this is the 'cost' of this upgrade. Each individual camera is different by age and wear (sensors tend to get corrosion on them lowering sensitivity) and multiple different PCB designs which utilized different part values. This means i'd have to examine each one on a case by case basis before I installed the new harness/capacitor/trimmer whatever. very time consuming. But to answer your question, Several that I pulled apart to do my prototype were in the 600 - 900pf range. Through sensor corrosion though, this put them way out of spec. I found that 600 speed film = anywhere from 100pf to 220pf, and the original sx-70 film was upwards of 1200pf depending on design. What I want is a simple adjustable solution so I didn't have to do expensive tests before disassembly, and again after. I'd like to build one part, that has enough variance built in to accommodate all the age and design variables.

Do you require a single n-position switch? Or could you live with having a set of small switches, e.g. DIP switches like these? They are very small, which is god from the perspective of space requirements, but a bit difficult to operate (because they are small). Instead of having one capacitor per film speed, you can use the DIP switch to put one or more capacitors in parallel. Having e.g. a 100pF cpacitor and a 220pF cpacitor allows you the following combinations:
100pF, 220pF, 320pF. Using more capacitors increases the number of permutations. The "cost" is that you have to "encode" the film speeds (exposure times) by having a dedicated set of switch positions for each. This schematic shows a set of four capacitors and 3 switches just for exampel:
cap-gif.13275

All switches open -> 100pF
All switches closed -> 750pF
other valuse in between according to switch position.
By not switching the leftmost 100pF capacitor i is ensured that always at least one capacitor is active. Use SMD capacitors for small size.

Instead of a DIP switch you can also use a coded rotary switch like e.g. this one. Bigger versions with knobs also do exist.

Harald

Harald,
I really like this idea, a Dip switch would give quite a bit of variation. But, I fear that we'd be selling ourselves short. I'd need two dips, one for each type of film. There is significant difference between the two films. A single dip with steppings like you mentioned may miss the mark needed. Remember these are subtle shutter speeds, where the precision and variety of a linear potentiometer would be handy. The pot wouldn't even have to be user accessible, something that I adjusted or the user adjusted after reading the advanced directions provided. It would be set at installation for each camera. and would eliminate all the testing needed that you can see that I replied to steve about. In this case, if my original idea works, or a variation on it I select the high point of the capacitance, then adjust down from there.

Here is what my modification is based off of. In this document, its just about switching permanently to 600 speed film. I want it all, and so do photographers, but it must be precise and work better that the original.
http://api.ning.com/files/QTKa8gPV8...fWvnl/Polaroid_SX70electronicmodification.pdf

Keep the ideas coming, I know this is a bit tough to wrap your heads around. but that document may help.
 
Last edited:

landcameras

Jun 3, 2014
13
Joined
Jun 3, 2014
Messages
13
1. Designing a board able to fit into the enclosure such that wires or board aren't sticking out
2. Finding a way to jumper the switch in a way that won't interfere with the shutter mechanism itself (i.e. not accidentally shorting it or something of the like)
3. Designing a light-leak-free way of tripping the light sensor. A little light goes a long way and I've had to shelve many of my 35mm manuals due to leaky shutters ruining film.


I'd be willing to help you with everything - trust me, I'm a college student and if the stuff I do on my website is any indication, lack of startup or build funds hinders me as well - I understand the plight of not having capital to bring additional "professional" hands onto a project. I'll work with you on this for free and everything else can be figured out as it becomes relevant if you so wish.

So this is the real solution i'd love to build. Think of it like a bionic arm for this old, worn camera that would give it new, precise life. I would sell 10's of thousands of them. hell, you could pay for your college! anyhow.. dreaming aside. If we could figure this out, I'd say a valid advanced prototype, then kickstart it for some production cash and exposure. The device would be in the $100 - $150 range is my guess. Lower would be better, but hell i have no idea. Maybe we could sell it for $50 and still make a good profit. I just don't know what it would take to make the plastic housing and parts. I have the social visibility in the photo community to get it on the map. I'm also on very good working terms with the new film manufacturer. I could get cases of free film to test with, which would be very important in this process, since we can't just look at an LCD screen :)
the skys the limit with the arduino's sensors. add a new, clean light sensor to override the old corroded one, sure. a modern electronic flash socket? check. ugh!! I just looked at http://www.femtoduino.com/ beautifully small and with Bluetooth! this opens up the app world. Control shutter speed, remote trigger etc. all from your smart phone.

as for your concerns

1. yeah, but we can make that work if we get custom enough i'm sure.
2. what switch? this external device needs no internal interaction with the cameras PCB. Just a way of detecting shutter press. Two way communication is possible with the remote shutter port as well.
3. think of a big clothes pin, the camera is about 1" thick is all. its super simple with some foam around the edge of the sensor. clip the device on with a hinged spring clip and shoot away.
 
Last edited:

KrisBlueNZ

Sadly passed away in 2015
Nov 28, 2011
8,393
Joined
Nov 28, 2011
Messages
8,393
Just to throw another crazy idea into the mix: Depending on how the capacitor is connected and used by the existing circuit in the camera, you may be able to replace it with a microcontroller that can do precise timing. Once you have a micro in there, your options expand hugely - you could make it controlled by an infra-red remote control transmitter to select the film type, for example.

You would need to find a schematic of the camera - or at least, the part that involves the capacitor.

My guess is that the capacitor will be held discharged, then when the picture is taken, it will be charged with a current that's proportional to the scene brightness, and when it reaches a fixed voltage threshold, the aperture (or whatever the word is) would close. So a larger capacitance would give a longer exposure, and higher scene brightness would reduce the exposure time because it would charge the capacitor more quickly. The capacitor might instead be charged initially, then discharged towards the threshold.

This is just a simple guess; I know very little about cameras. Steve does photography so he may know more; he may even be familiar with that model. But in any case, a schematic, and preferably a technical description, would be very helpful.

If the capacitor is used in the way I described, you could replace it with a little 8-pin micro with on-board ADC to detect when the timing interval has started and measure the capacitor current, and a series MOSFET to break the circuit so the threshold is reached at the appropriate time.

A simpler option would be a capacitance multiplier. This can be implemented with an 8-pin op-amp. The capacitance multiplication can be set with switched resistors or even a trimpot with markings for different film settings. Again this arrangement would only work if one of the capacitor terminals is tied to either V+ or 0V.
 

landcameras

Jun 3, 2014
13
Joined
Jun 3, 2014
Messages
13
KrisBlueNZ,
now this is what I'm talking about. You're correct, Its only charged when exposure is fired. Its native capacitance varies like I said above. But! its linear. For example:
Native film is 100 Speed. Which is exactly 2.5x slower than 600 speed. (film speeds are rated in double so it goes 100/200/400/800).
The capacitor in one camera example was native at ~900pf. Through testing, I was able to determine the correct capacitance for 600 speed film to be a 150pf cap. 150*2 = 300 *2 = 600 +300 = 900pf

your guess about how it works is exactly correct. that is why we can change capacitors and the relationship to exposure is the same even though light value of a particular scene would be changed.

SO... that micro controller :) anyone wanna point it out and tell me how it would be done? That solution sounds rather bulky though. I don't have much room. hell the board is simple enough, redesigning it wouldn't be too hard but I'll leave that to a larger project.
 

landcameras

Jun 3, 2014
13
Joined
Jun 3, 2014
Messages
13
A simpler option would be a capacitance multiplier. This can be implemented with an 8-pin op-amp. The capacitance multiplication can be set with switched resistors or even a trimpot with markings for different film settings. Again this arrangement would only work if one of the capacitor terminals is tied to either V+ or 0V.
short of having the original schematic, how could I tell if one leg is V+/0V (I've put a request out to those who would have the schematics of this camera to see if I could get a copy)
 
Last edited:

KrisBlueNZ

Sadly passed away in 2015
Nov 28, 2011
8,393
Joined
Nov 28, 2011
Messages
8,393
Can you start by uploading some nicely zoomed pics of the board, with the capacitor labelled, including the IC that the capacitor connects to? Both sides of the board are probably relevant. See https://www.electronicspoint.com/resources/how-to-take-photos-of-circuit-boards.6/

A few pictures of all the electronic parts of the camera could be helpful. As I said, I know almost nothing about cameras and nothing at all about that particular model!

A microcontroller-based solution could be very compact.

What kind of battery does the camera use? Do you know anything about the supply voltages inside the camera? Do you know where the regulator is?

Some technical information would be VERY helpful.

I don't understand what you mean by "it's linear". Those relationships don't look linear to me. But that's just a detail we can address later.
 

landcameras

Jun 3, 2014
13
Joined
Jun 3, 2014
Messages
13
ok, let me collect all that information. give me a few hours, or later today

In my reasoning, the relationship of capacitance to ISO speed is linear because I can use the same equation to determine a value. If you were to tell me that you wanted to run a 1000iso film I could determine what capacitor to use without testing, all other things being equal.
 

landcameras

Jun 3, 2014
13
Joined
Jun 3, 2014
Messages
13
This information is not complete, but it'll put it up here for thought.
Voltage incoming is 6.0v at the battery. I believe its lithium but I'll need to confirm that. Its housed inside every film pack. As for access to voltage, you can see in that really bad schematic below where it drops in and feeds to the main board.

circuit.png
electrical.png
circuit-cap.jpg The cap in question lives on the back side of the board. I'll have to get you that photo later. This page gives a bit of background and better photos of the inward facing side: http://www.chemie.unibas.ch/~holder/sx70tech.html
 

landcameras

Jun 3, 2014
13
Joined
Jun 3, 2014
Messages
13
Heres some updated, larger photos. I've included several versions of the board.

sx-70-board.jpg Older version of board. Model 1
sx-70-board-2.jpgNewer Version. Alpha and Model 2 version

sx-70-board-4.jpg sx-70-board-2-2.jpg Attached exposure capacitor. Model 1. Unlabeled capacitance. Alpha/m2 capacitors are 920pF
sx-70-board-5.jpg Hidden, Front face of ECM/PCB. M1
sx-70-board-3.jpg Hidden, front face of ECM/PCB. Alpha / m2

The real variable is what capacitor to use. You can see in the photos the sensor module, and its corrosion. This changes sensitivity and therefore the capacitance needed. This is also why a means of trimming capacitance is a must
 

Solidus

Jun 19, 2011
349
Joined
Jun 19, 2011
Messages
349
It would not be too difficult to completely create a replacement board with complete control and functionality using a microcontroller. That board doesn't appear to be very complex, at least on that one side.

I meant to reply to this yesterday, but my app-writing got the best of me. If you decide to go the Bluetooth route, I've experimented with writing iPhone apps using BT frameworks, so I can also work with you in that regard.
 

landcameras

Jun 3, 2014
13
Joined
Jun 3, 2014
Messages
13
The above pictures are both sides of the board. Yeah its amazingly simple. That repair doc, as dry and tough on the eyes as it is is very informative about functionality and timing too. I think we'd need an actual schematic though. Not sure what those chips are.
Man i would really love to do this project (aside from the simple mod to change film speeds). It would blow up, seriously.
 
Top