Maker Pro
Maker Pro

Basic LED Questions

takeback

Oct 27, 2009
1
Joined
Oct 27, 2009
Messages
1
Question from a beginner-

Preface I am a "sub novice" and have no electronics experience or training.

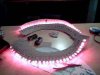
I am building a halloween costume for my son as a Robot and have set up some basic LEDs. I found a beginner's tutorial on instructables.com which was very helpful in explaining things from the ground up.


While at radio shack I found the blinking LEDs, which of course I thought would look cool. From what I have read online so far, I sense that setting up the flashing LEDs is beyond my knowledge base (or time frame!) right now, so I am going to only use regular LEDs for the costume. However, I find this stuff very interesting so maybe you can shed some light for me.

My questions:

-The led has three leads instead of two. What is the third for?
- I hooked one up with the appropriate calculated resistor. It blinked for about a minute or less and then stopped. What is the reason it stops?
-My web research talks about using a timer circuit ("555"), which I wiki'd but obviously alot of the technical description is beyond me. Is a timer part of using these flashing LEDs?

Thanks alot to anyone willing to explain these fundamentals.
 

Ian

Administrator
Aug 23, 2006
1,486
Joined
Aug 23, 2006
Messages
1,486
Hi takeback, welcome to the site:)

First of all, congrats on getting your first circuit going ;)

I guess you have a Dual-Colour LED - often these allow you to show any colour from Green>Red in the colour spectrum (or you can just use it to show green/red at one time).

Can you explain a little about the circuit you created, as I'm not sure why the LED would blink for a little while and then stop. Does it work if you re-connect the power source? If not, it could have blown.

A 555 timer would enable you to create a flashing LED, but you should be able to do this much more easily as you can buy LEDs that have an embedded IC that makes them flash. I'm not familiar with stores in the US (I guess you are from there?), but someone else here may be able to point you in the right direction :)
 

Gerbil

Nov 4, 2009
9
Joined
Nov 4, 2009
Messages
9
Hi there, I'm after some basic LED information as well, for a similar idea.
I bought a couple of christmas light LED sets, and want to convert them to run off 1.2V rechargable batteries. The LEDs have the following specs:
Red: 2.2V
Blue: 3.8V
with both running at roughly 0.076 watts. The original lights are in sets of 60 (2 lots of 30 in series), running from 120V 60Hz AC.

Due to space/weight restrictions I can't really afford to run them off of more than 6 batteries (the lights only need to run for about 5 minutes anyway, it's for a presentation).

Just messing around, an individual blue LED was happy being connected to 3 1.2V cells in series, but 2 1.2V cells burns out the red LED almost immediately, with 1 cell not being enough to force the red LED to emit even the tiniest bit of light, so I'm not really sure what to do - I assume a resistor of some description would help, but would I need 1 per bulb (assuming they end up being connected in parallel which in theory is easiest for me to wire), or just once in the loop?

So essentially, what do I need to hook up up to 100 LEDs in parallel, using the minimum number of batteries, in the simplest manner possible? :)

Thanks in advance.
 

Resqueline

Jul 31, 2009
2,848
Joined
Jul 31, 2009
Messages
2,848
As you discovered you can't just connect a LED to a voltage source and expect it to work. They each have a nominal voltage drop but this can vary enough from batch to batch that they either remain dark or fries. The current increases exponentially as you increase the voltage just a little above nominal.
So it's essential to feed them with a more or less constant current. The simplest way is using resistors.

With the red's you could hook 2 in series (=4.4V) for each resistor, but the blue's needs 1 resistor per LED. With this setup you could get away with 4 batteries (4.8V).
The "red" resistors would see ca. 0.4V and the "blue" resistors would see ca. 1V.
Red current: 0.076/2.2=35mA. Red resistor: 0.4/0.035=12 ohms.
Blue current: 0.076/3.8=20mA. Blue resistor: 1/0.02=50 ohms.

If you were to use 1 resistor for each red LED too then it would have to be: (4.8-2.2)/0.035=75 ohms. This will ensure a more stable current (remember that the batteries starts out at 1.3V each) but the total current consumption will of course be higher. You still have to use 4 batteries because of the blue LED's.
 

Gerbil

Nov 4, 2009
9
Joined
Nov 4, 2009
Messages
9
Thanks very much - I can also now see where you get the maths from so I should be able to experiment with other lights and stuff as well.
Now I just need to find an easy way of welding a couple of hundred resistors and LEDs together. I'm hoping it's not a big job...... :)

Would you be able to say whether the resistors would generate much heat?
They need to be wrapped up into something slightly flexible, and frankly given this is a rush/first job, I was actually planning to just align the LEDs in corrugated cardboard and wrap the whole thing up in insulating tape. Is this viable?
 
Last edited:

lwalker

Nov 4, 2009
3
Joined
Nov 4, 2009
Messages
3
help with no power acer monitor

my monitor has no power-- I changed the source plug and still no power-- any ideas
thank you
lwalker
 

Resqueline

Jul 31, 2009
2,848
Joined
Jul 31, 2009
Messages
2,848
The most power would be on the single red LED resistor: (5.2-2.2)*0.04=0.12W which means you can use the smallest resistors you gan get your hands on (1/8W).
You do have a few hundred solder joints ahead of you - and it'll take some time - but you'll be good at soldering when you finish..
Cardboard & (whatever) tape is fine, no problems. You can sandwich the resistors & wiring job between cardboards, no need to overdo it, & heat won't be a problem.

(Iwalker: it's beneficial for you if you make your own new thread, and include some more details.)
 

Gerbil

Nov 4, 2009
9
Joined
Nov 4, 2009
Messages
9
Hi Resqueline, thanks for putting my mind at rest regarding the cardboard / heat setup.
I'm not sure I follow your maths though - I've been using the formulae that you posted originally, and just discovered that the red current value is different - it's not 0.076 but 0.044, so I'd like to check here if what I'm about to go out and buy makes sense.
First off, the batteries are rated at 1.2W - how come you value them as 1.3W, is that just a 'known thing'? :) I'll take your word for it and go with the 1.3, but I'm curious as to where it comes from!
Anyway, the red and blue LED light strings will be seperate, so in fact I can run the red ones from a measly 2 batteries, which is a useful weight saving. In theory I could run the blue ones from 3 batteries, but the holders I've seen here come in sets of 2 and 4 and frankly the less I have to manually change the better, so...

Blue LED setup (4 batteries, all LEDs in parallel):
(5.2 - 3.8) / (0.076 / 3.8) = 70 ohms resistor.

Red LED setup (2 batteries, all LEDs in parallel):
(2.6 - 2.2) / (0.044 / 2.2) = 20 ohms resistor.

Do those values look right to you?
I'll go with the higher values,

And if I should find a 3 battery holder:
(3.9 - 3.8) / (0.076 / 3.8) = 5 ohms resistor.

Thanks again for your help. If I get it working I'll stick up some photos.
I also intend to use this knowledge to build myself a Christmas cap :)
 

Resqueline

Jul 31, 2009
2,848
Joined
Jul 31, 2009
Messages
2,848
Ok, the new differing values indicates a string current of 20mA for all the LED's.

Battery voltage; I used 1.3V only for the worst case resistor power calculation.
Be aware that a recently charged battery have a resting voltage as high as 1.36V.
In practice these batteries start their discharge at 1.3V, have an average discharge voltage of 1.2, and end their useful discharge at 1.1V.
So you may have to do some worst-case calculations, find out what's acceptable, and do some compromises. LED's can stand some overcurrent for a while. 0.1W (25mA) is a safe dissipation level for small blue & white LED's. Doubling the dissipation will decrease their life tenfold, but they start out at 100000 hours so 5 minutes of 30mA "abuse" won't matter much.
LED flashlights with 3 batteries and a low-ohm resistor are prone to short life because there's little stability to the current; very high with fresh batteries and very low with run-down batteries. They are also very sensitive to poor battery contact; they flicker easily. The LED voltage drop is not an absolute fixed value either. Better to use that extra battery and a higher resistance.

Your calculations are correct, but I suggest you use 1.2V to find the resistor values and then calculate what the current will be at 1.3 & 1.1V respectively. If it's double & nothing then you'll have to change something. (More batteries & higher resistance &/or less LED's in series.)

Wether it's better to use 4 + 2 batteries instead of just 4 batteries & 2 red's in series will depend on the physical layout and use. Please calculate the total currents to see that they don't get astronomical. (That's a lot of LED's, and many battery holders start to develop a noticeable voltage drop when going over 1 amp..)

You're welcome, always happy to help. Please do post results, it's nice to know how it turned out.
 

lwalker

Nov 4, 2009
3
Joined
Nov 4, 2009
Messages
3
lost power on monitor

The most power would be on the single red LED resistor: (5.2-2.2)*0.04=0.12W which means you can use the smallest resistors you gan get your hands on (1/8W).
You do have a few hundred solder joints ahead of you - and it'll take some time - but you'll be good at soldering when you finish..
Cardboard & (whatever) tape is fine, no problems. You can sandwich the resistors & wiring job between cardboards, no need to overdo it, & heat won't be a problem.

(Iwalker: it's beneficial for you if you make your own new thread, and include some more details.)

I think this site is over my head-- I can not even figure out how to start a new thread (LOL).
I guess the answer for me is to purchase another monitor as my Acer monitor just all of a sudden does not turn on when I hit the power on button. and the power source(plug) has been checked and it does work.
Thanks for your help
lwalker
 

Resqueline

Jul 31, 2009
2,848
Joined
Jul 31, 2009
Messages
2,848
Iwalker: Oh, well, I guess we can adjust.. ;)
There's a button called "New Thread" in the page previous to this one. It's in the same position as the "Post Reply" button on this page. If you go even further up, to the homepage, you'll also find that this here forum is called "General Electronics Chat" but the one you'd want to post your question in is called "Electronics Repair".
But to answer your question straight away; since the power supply is internal to the monitor then yes, you have to buy a new monitor. That is unless you want to have a go at repairing the internal power. It can be done but is not for the faint of heart. You'll have to be able to measure, identify & get new components, and solder.
 

lwalker

Nov 4, 2009
3
Joined
Nov 4, 2009
Messages
3
Iwalker: Oh, well, I guess we can adjust.. ;)
There's a button called "New Thread" in the page previous to this one. It's in the same position as the "Post Reply" button on this page. If you go even further up, to the homepage, you'll also find that this here forum is called "General Electronics Chat" but the one you'd want to post your question in is called "Electronics Repair".
But to answer your question straight away; since the power supply is internal to the monitor then yes, you have to buy a new monitor. That is unless you want to have a go at repairing the internal power. It can be done but is not for the faint of heart. You'll have to be able to measure, identify & get new components, and solder.

Thank You-- Yes I am sure not technical and so will buy another mionitor. I appreciate your help-you are very kind to help me, and now I know how to get to a new thread, but opening a monitor is not something I could do! Thanks again
Have a good day--
lwalker
 

Gerbil

Nov 4, 2009
9
Joined
Nov 4, 2009
Messages
9
Oops, I've already started joining up the single red LEDs to the resistors and what-not for the 2 battery set-up. If it becomes a problem I'll split the LED chains and use a seperate battery pack for half (at this point I think it'll be roughly 40 LEDs per 2 batteries, which if it's still too much I can probably reduce to 30 or so (we are aiming for the general 'glow' rather than a specific number of LEDs).
 

Resqueline

Jul 31, 2009
2,848
Joined
Jul 31, 2009
Messages
2,848
50 LED strings will amount to approx. 1A so I think that around 40 will be ok, 60 might be pushing it.
But I guess serious problems could start to develop around 2A, with possible plastic melting around battery contacts. The spiral wound contact springs would be most susceptible to this.
 

Gerbil

Nov 4, 2009
9
Joined
Nov 4, 2009
Messages
9
So far so good.
I have done hardly any soldering so far, I've just twisted all the wires together, but here you can see the results.
29 LEDs per set, with a few more small sets. These two parts are destined for the shoulders.
attachment.php
 

Attachments

  • LEDs.jpg
    LEDs.jpg
    13.5 KB · Views: 263

Graham

Nov 10, 2009
30
Joined
Nov 10, 2009
Messages
30
In theory I could run the blue ones from 3 batteries, but the holders I've seen here come in sets of 2 and 4...

Hi Gerbil,
In response to the 2-battery/4-battery holder problem, I have seen battery 'blanks' advertised, which are basically just a plastic dummy battery with a copper core running through it, thereby allowing you to plug one of the holes in a 4-battery holder and still have three batteries-worth of voltage. Of course, you don't really need to be that sophisticated... a suitably re-worked paper clip will do the job just as well (but not look quite so polished).

Hope the project is going well.

Cheers,
Graham.
 

Gerbil

Nov 4, 2009
9
Joined
Nov 4, 2009
Messages
9
Thanks for the tip, I'll try to remember for next time :)
The project isn't for halloween, it's for a cosplay competition this coming weekend.
I've got all the red LEDs wired in and working, and am nearly done with the blue ones, which seem to be strangely bright. I get the feeling maybe I was given the wrong resistors because of the brightness and the fact the resistors do actually run fairly hot.
I'll have to leave the whole set up running for a few hours to check nothing unexpected and nasty will happen...
On the plus side, the blue LEDs are to be used at the end, so the fact they are bright could be considered a bonus :)

I am also taking a short-cut on the blue LEDs, I'll only be soldering critical areas - we ended up covering the wiring on the red ones in so much silicon (glue gun stuff? dunno what it's name is in English) that I reckon I'll just go with that and nothing else because the wires are all twisted together a lot, so merely holding it in place and protecting it should be fine (and save me a bit of time!).

Photos to come after the event.
 

neon

Oct 21, 2006
1,325
Joined
Oct 21, 2006
Messages
1,325
Ok, the new differing values indicates a string current of 20mA for all the LED's.

Battery voltage; I used 1.3V only for the worst case resistor power calculation.
Be aware that a recently charged battery have a resting voltage as high as 1.36V.
In practice these batteries start their discharge at 1.3V, have an average discharge voltage of 1.2, and end their useful discharge at 1.1V.
So you may have to do some worst-case calculations, find out what's acceptable, and do some compromises. LED's can stand some overcurrent for a while. 0.1W (25mA) is a safe dissipation level for small blue & white LED's. Doubling the dissipation will decrease their life tenfold, but they start out at 100000 hours so 5 minutes of 30mA "abuse" won't matter much.
LED flashlights with 3 batteries and a low-ohm resistor are prone to short life because there's little stability to the current; very high with fresh batteries and very low with run-down batteries. They are also very sensitive to poor battery contact; they flicker easily. The LED voltage drop is not an absolute fixed value either. Better to use that extra battery and a higher resistance.

Your calculations are correct, but I suggest you use 1.2V to find the resistor values and then calculate what the current will be at 1.3 & 1.1V respectively. If it's double & nothing then you'll have to change something. (More batteries & higher resistance &/or less LED's in series.)

Wether it's better to use 4 + 2 batteries instead of just 4 batteries & 2 red's in series will depend on the physical layout and use. Please calculate the total currents to see that they don't get astronomical. (That's a lot of LED's, and many battery holders start to develop a noticeable voltage drop when going over 1 amp..)

You're welcome, always happy to help. Please do post results, it's nice to know how it turned out.

You maybe interested to know that LEDS are seldom 1.3v. they can be 1.8 to 5v each
 

Resqueline

Jul 31, 2009
2,848
Joined
Jul 31, 2009
Messages
2,848
neon: as usual I have a hard time understanding what you are talking about...
Please do some reading & homework before you post..

gerbil: can you post the color codes of the resistors you got?
 

Gerbil

Nov 4, 2009
9
Joined
Nov 4, 2009
Messages
9
I'll give a fullish write-up of the mess I ended up with soon when I've had time to rest.
The girl with the costumes came second in the national cosplay tournament - I'd like to think that the lights helped a tiny bit, because they worked - a minor miracle in itself (I'm sure you'll agree when you see the photo of the wiring I did!).
Beaten by a 3 meter tall costume of some description that apparently cost over $2000 to make, so we don't feel too bad!
 
Last edited:
Top