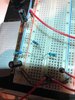
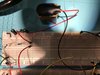
Maker Pro
Maker Pro

A Stretch

Alec_t

Jul 7, 2015
3,590
Joined
Jul 7, 2015
Messages
3,590
I am not sure that all those grounds are connected together
I suggest you make sure that they are.
wherever it says Ground, I run a wire from that connection to the negative rail.
If you are referring to the various points in your circuit that are marked as grounds then yes, they all connect to the negative rail. That rail also has to connect to the guitar ground and the Fender ground.
 
Last edited:

SparkyCal

Mar 11, 2020
849
Joined
Mar 11, 2020
Messages
849
We are making progress. I stupidly forgot to turn on the power supply last time, and that is why all the buzz was there. With the power supply in, there is no buzz and I am getting a nice clean sound out to the Fender amplifier.

However, there is no distortion. I put the multimeter probes on. the + probe on pin 6 and the - on ground. i got a flashing reading of 5.986

So, the question now is, why no distortion? Also, the circuit is now without the tone control. But I don't know that the tone control was causing a problem because I did not have the power supply on at the time.

Maybe we should leave the tone control out of the circuit till the distortion issue is solved?
 

bertus

Moderator
Nov 8, 2019
3,326
Joined
Nov 8, 2019
Messages
3,326
Hello,

Did you read what Audioguru said:

If you have a voltmeter then when the battery is 9VDC the pin 6 output of the opamp should be half at 4.5VDC.
The TL081 opamp might not work if the battery voltage drops below 7VDC.


What is the current battery voltage?
If it is below 7 Volts, replace the battery with a fresh one.

Bertus
 

SparkyCal

Mar 11, 2020
849
Joined
Mar 11, 2020
Messages
849
Sorry. Let me clarify. I am using a power supply set at 9v. I held the positive probe of my multimeter at pin 6, and my negative problem to the negative line out of the power supply. I register 7.8 v. Still no distortion though.
 

Audioguru

Sep 24, 2016
3,656
Joined
Sep 24, 2016
Messages
3,656
The diodes cause the distortion. If the gain control is turned down too low then it shorts the diodes causing no distortion. Turn up the gain control for the diodes to cause distortion.
 

SparkyCal

Mar 11, 2020
849
Joined
Mar 11, 2020
Messages
849
When I turn the gain, it doesn't seem to do much. I have the left prong of the gain connected to Pin 2, and the right side of the gain (that is also shorted to the middle prong) connected to Pin 6
 

Audioguru

Sep 24, 2016
3,656
Joined
Sep 24, 2016
Messages
3,656
The voltage at pin 6 of the opamp is wrong, it is much too high. It should be +4.5V. The 4.5V (measure it) is formed by the voltage divider of R32 and R33 then it is passed to the pin 3 input of the opamp. Check that R32 and R34 are the same values. Your gain control is correctly connected but it must be 500k ohms.
 

SparkyCal

Mar 11, 2020
849
Joined
Mar 11, 2020
Messages
849
I know this pic is not the best, but here is a pic of the area of the breadboard that Audioguru is asking about.

You will notice that C30 is between the + and - rails on breadboard

R32 (10K) (left leg in on - rail), right leg is on breadboard pin (Row 9, second hole from + rail-hole 2

On the next pin up, (Row 9 , hole 3), is the R41 1M

On the next pin up, (Row 9 , hole 4), is one leg of R33 and the other leg of it goes to the positive rail (near row 15)

I hope this helps somewhat. Maybe there is a mistake here? I am still reading 7.9 v now when I connect the multimeter to Pin 6 and the - probe of my power supply.
 

Attachments

  • power.jpg
    power.jpg
    46.8 KB · Views: 8

SparkyCal

Mar 11, 2020
849
Joined
Mar 11, 2020
Messages
849
I am on my way to an appt, but I will check back and try whatever advice is given, when I return in about an hour ro two.

Thanks for hanging in., We're close.
 

SparkyCal

Mar 11, 2020
849
Joined
Mar 11, 2020
Messages
849
Would it make sense for me to rebuild the power part of this circuit from scratch? Then we can ensure it is built properly and that it is sending the right voltage.
 

Audioguru

Sep 24, 2016
3,656
Joined
Sep 24, 2016
Messages
3,656
I know this pic is not the best, but here is a pic of the area of the breadboard that Audioguru is asking about.

You will notice that C30 is between the + and - rails on breadboard.
No. C30 connects to +4.5V, NOT to +9V.
The power part of the circuit has only two resistors, two capacitors and a battery. how can it be wrong?

Solderless breadboards are a nightmare of intermittent connections and wires all over the place.
Instead, I make a neat and tidy drawing showing all parts values, then I solder the parts and a few jumper wires on a compact stripboard layout. The parts have short straight wires and a few short straight jumper wires make the circuit neat and tidy. The copper strips are cut to length with a drill bit then each copper strip can be used as multiple wires.
Here are two examples of circuits built on stripboard:
 

Attachments

  • stripboard.JPG
    stripboard.JPG
    66.2 KB · Views: 6

SparkyCal

Mar 11, 2020
849
Joined
Mar 11, 2020
Messages
849
Thanks guys. I don't know what to suggest any more. I rebuilt the power section with new resistors and capacitors and I am still getting a reading of 7.784v. when I put the positive multimeter probe on pin 6, and the negative multimeter probe on ground.

Part of my frustration is that i am not sure what format works best for you in terms of my explaining what i am doing and what i am connecting. I have attached another zoomed in shot of the power set up. I hope you can use this picture to see my connections for the power part.
 

Attachments

  • 0000000.jpg
    0000000.jpg
    321.3 KB · Views: 6

bertus

Moderator
Nov 8, 2019
3,326
Joined
Nov 8, 2019
Messages
3,326
Hello,

I get a login page when I go to link.
Is the sound very low in volume, also at high gain?
Than it could be your input signal is to low.
In the circuit an input signal of 400 mV is expected.

Bertus
 

Martaine2005

May 12, 2015
4,951
Joined
May 12, 2015
Messages
4,951
I get the same login page. Permission is required.
Read my post in your other thread.
But above all, follow the steps in the video. He starts very simply. Use the pause button and take screen shots.
This is such a simple circuit, be methodical.

Martin
 

Audioguru

Sep 24, 2016
3,656
Joined
Sep 24, 2016
Messages
3,656
Here is what it sounds like. Has no distortion. The 500K volume knob is working properly, in that it increases the volume- but there is no distortion.
The circuit does not have a 500k volume control. Maybe you wrongly use the 500k pot as a volume control and wrongly use the 100k pot as the gain control? Then the maximum gain will be 5 times less.

You still have a problem with the too high voltage at the opamp output. Maybe the Mickey Mouse breadboard has bad contacts. Look here:
 

Attachments

  • power section.png
    power section.png
    33.8 KB · Views: 4
Last edited:

Martaine2005

May 12, 2015
4,951
Joined
May 12, 2015
Messages
4,951
That link provided by @bertus is great. Follow it, read it and understand it.
When the circuit is complete and working, you can change cap values to see the differences.
Use a good or new battery. Or use a bench supply.
Don’t assume it’s not working straight away. Push components into the breadboard for good connections. Double check all connections and don’t forget to apply power!.

Martin
 

SparkyCal

Mar 11, 2020
849
Joined
Mar 11, 2020
Messages
849
Thank you. I may have incorrectly interchanged terms calling volume gain and vice versa. I am using the right pots with the right values in the right places.

the signal in comes from a Fender telecaster, so the signal in is good.
I will re-examine the whole circuit again and report back.
 
Top